

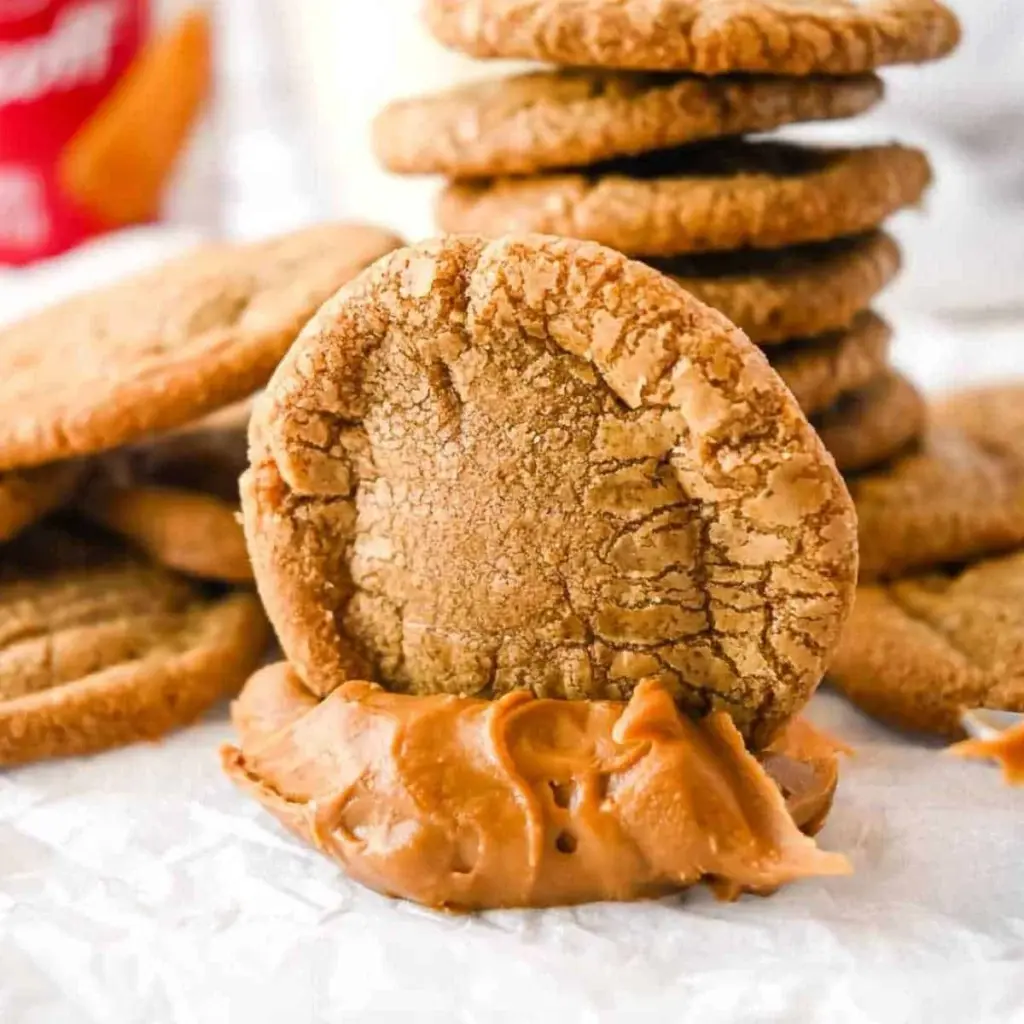
Cookie Butter Cookies are a delightful treat that combines the rich, spiced flavor of cookie butter with the comforting simplicity of traditional cookies. These cookies are not only incredibly easy to make but also offer a warm, nostalgic taste that’s perfect for family gatherings or a cozy evening at home. With a few simple ingredients and a straightforward step-by-step approach, you’ll find yourself creating these irresistible treats in no time.
Ingredients
To create the perfect Cookie Butter Cookies, you’ll require:
- 1 cup cookie butter (also known as Biscoff or Speculoos): This creamy spread is full of rich, caramelized flavors that will envelop your palate in sweetness with every bite.
- 1/2 cup sugar: The sweetness enhances the cookie butter’s natural flavors, giving the cookies a lovely, crisp outside.
- 1 large egg: This binder enriches the cookie dough, ensuring it holds together beautifully and adds moisture for a soft texture.
- 1/3 cup oat flour: A gluten-free option that adds a subtle nuttiness; feel free to increase this to 1/2 cup if the mixture seems a touch too moist.
Step-by-Step Directions
-
Preheat your oven to 350°F (175°C). This is an important step to ensure your cookies bake evenly and become that perfect golden brown.
-
In a large bowl, whisk together the sugar and egg until the mixture is smooth and well incorporated. The creamy consistency will help create a luscious dough that bakes beautifully.
-
Add the cookie butter to the egg-sugar mixture. Stir gently until fully combined. The aroma will remind you of a bakery, with hints of sweet spices wafting through the air.
-
Incorporate oat flour, mixing with a wooden spoon or paddle attachment on a stand mixer. Ensure there are no dry spots—this step is key for achieving the right texture.
-
Cover the bowl with plastic wrap and place it in the refrigerator for about 30 minutes. Chilling the dough helps prevent spreading and promotes a chewier cookie texture once baked.
-
Using a small ice cream scooper or a tablespoon, roll the dough into approximately 18 equal-sized balls. This method ensures uniform baking, giving you that perfect batch every time.
-
Place the cookie balls on a sheet pan lined with parchment paper, leaving about 1-2 inches of space between each cookie.
-
Before baking, use a fork to create a small criss-cross pattern on the top of each cookie. This classic design isn’t just for looks; it also helps them bake perfectly.
-
Bake for 6-8 minutes, or until they are golden brown. Keep a close eye—every oven is different, and you want to catch them just before they become too crispy.
-
Let the cookies cool on the pan for a few minutes before transferring them to a wire rack to cool completely. This step allows them to firm up and develop their ultimate crispy-chewy texture.
Tips & Tricks
For that extra touch, consider adding a pinch of cinnamon or nutmeg to your cookie dough for a warm, spiced flavor. If you desire a crunch, nuts like pecans or walnuts can be mixed into the dough before baking. Always remember to test a small batch to adjust flavors and textures according to your preferences!
Serving Suggestions & Pairings
These cookies are perfect on their own with a hot cup of coffee or tea, but they can also be served at special occasions like birthdays or holidays. Consider placing them in decorative cookie jars or gift boxes for a delightful homemade present. Pair them with vanilla ice cream for an indulgent dessert twist or crumble them over yogurt for a sweet breakfast treat.
Nutritional Information
On average, each Cookie Butter Cookie contains roughly 90-100 calories, depending on the size. They also provide a source of carbohydrates and moderate fats, mainly from the cookie butter and sugar. Remember that balance is key; enjoy these cookies as a treat alongside a varied diet.
Storing Tips & Variations
These cookies can be stored in an airtight container at room temperature for up to a week. If you want to keep them longer, consider freezing the cookie dough balls before baking. When ready to enjoy, simply bake them directly from the freezer (adding a minute or two to the baking time). Variations can include different flavored butters or even incorporating chocolate chips for added decadence.
Conclusion
Cookie Butter Cookies are straightforward and satisfying, making them a fantastic treat for any occasion. Whether you’re baking for family or simply treating yourself, this recipe is sure to please. So, gather your ingredients, follow the steps, and create something truly delectable! We’d love to hear about your experience and see how yours turn out in the comments below.
FAQs
-
Can I make these cookies gluten-free?
Yes, you can substitute all-purpose flour with a gluten-free flour blend or stick to the oat flour as listed. -
What can I use if I don’t have cookie butter?
You can use a similar spread, such as peanut butter or Nutella, but keep in mind that this will change the flavor profile of your cookies. -
How long do these cookies stay fresh?
Stored properly in an airtight container, they can last for about a week at room temperature, or longer if frozen. -
Can I add mix-ins to the dough?
Absolutely! Feel free to add chocolate chips, nuts, or even dried fruits to enhance the flavor and texture of your cookies. -
What should I do if my dough is too dry?
If your dough seems dry, gradually add a tablespoon of milk or additional cookie butter until you reach the desired consistency.
Cookie Butter Cookies
Ingredients
Method
- Preheat your oven to 350°F (175°C).
- In a large bowl, whisk together the sugar and egg until smooth and well combined.
- Add the cookie butter to the egg-sugar mixture and stir gently until fully combined.
- Incorporate oat flour, mixing until there are no dry spots.
- Cover the bowl with plastic wrap and refrigerate for about 30 minutes.
- Roll the dough into approximately 18 equal-sized balls using a small ice cream scoop or tablespoon.
- Place the cookie balls on a parchment-lined sheet pan, leaving space between each cookie.
- Use a fork to create a criss-cross pattern on top of each cookie.
- Bake for 6-8 minutes or until golden brown.
- Cool on the pan for a few minutes before transferring to a wire rack.

Leave a Reply